
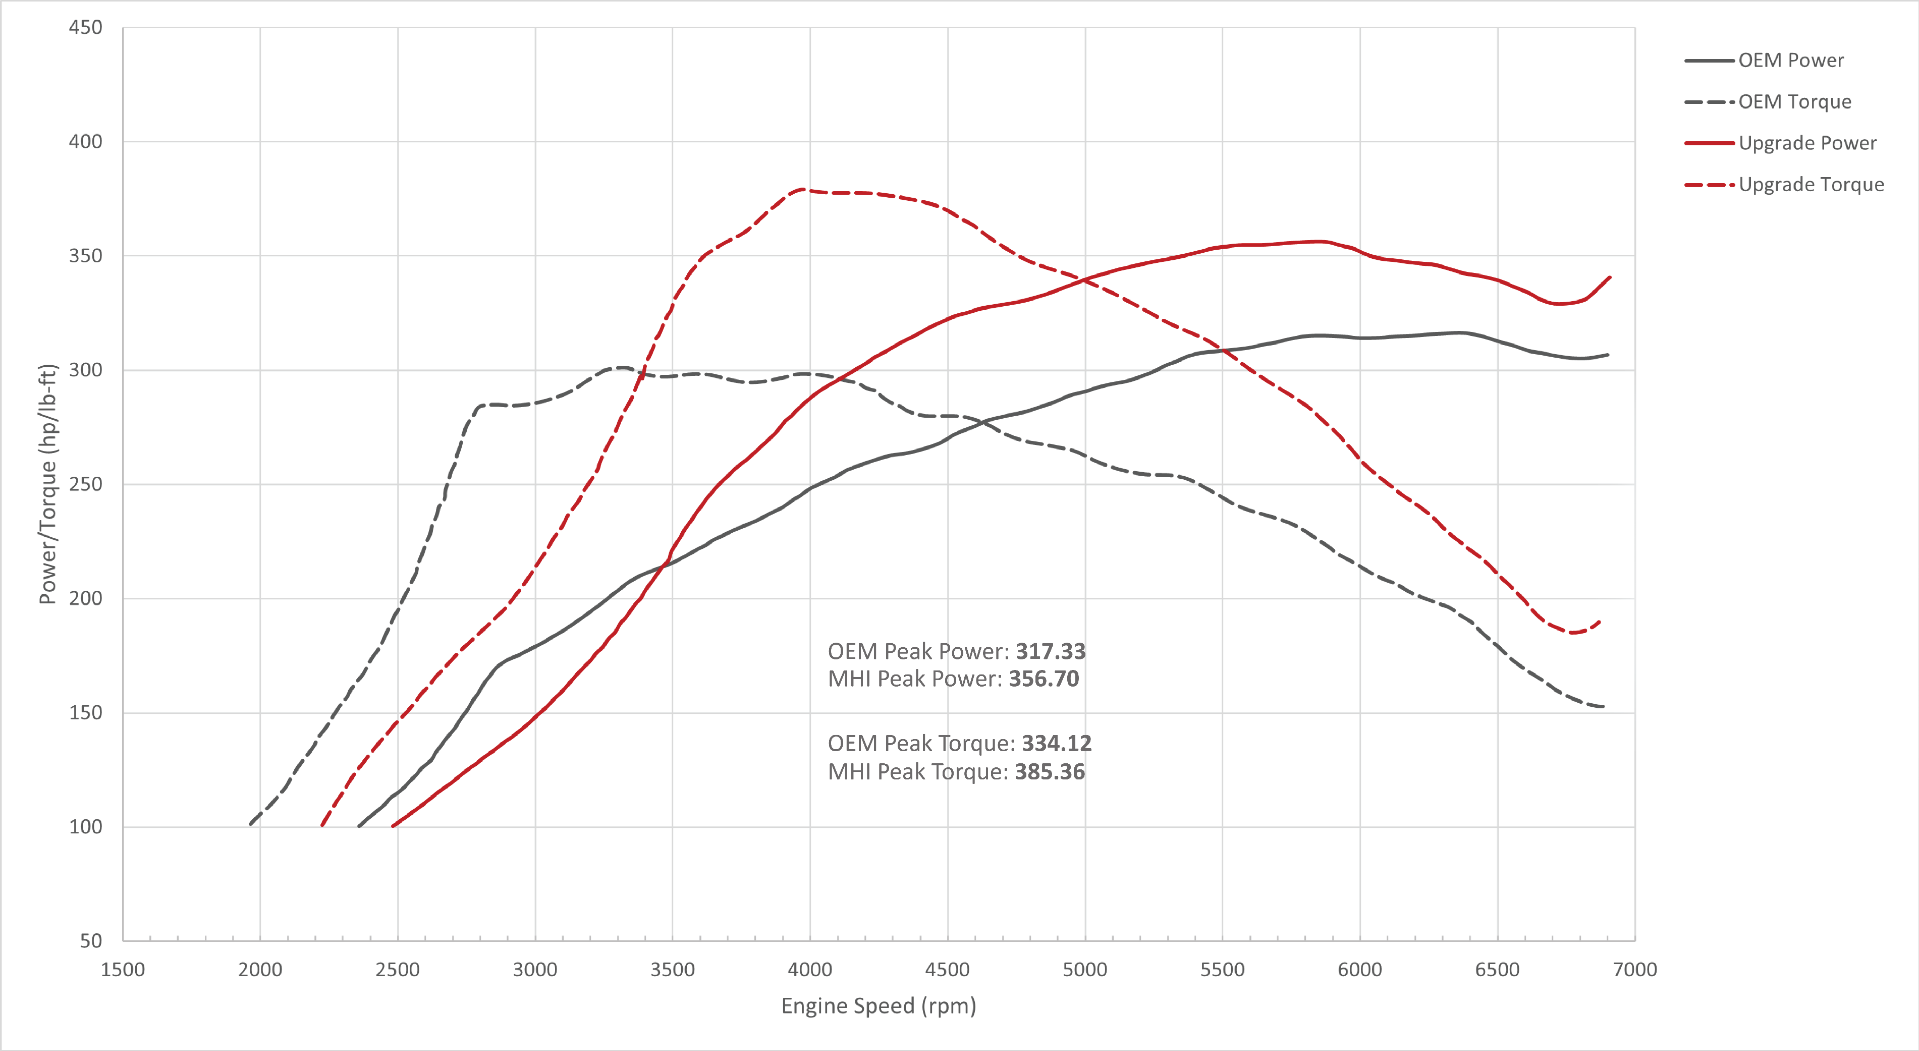
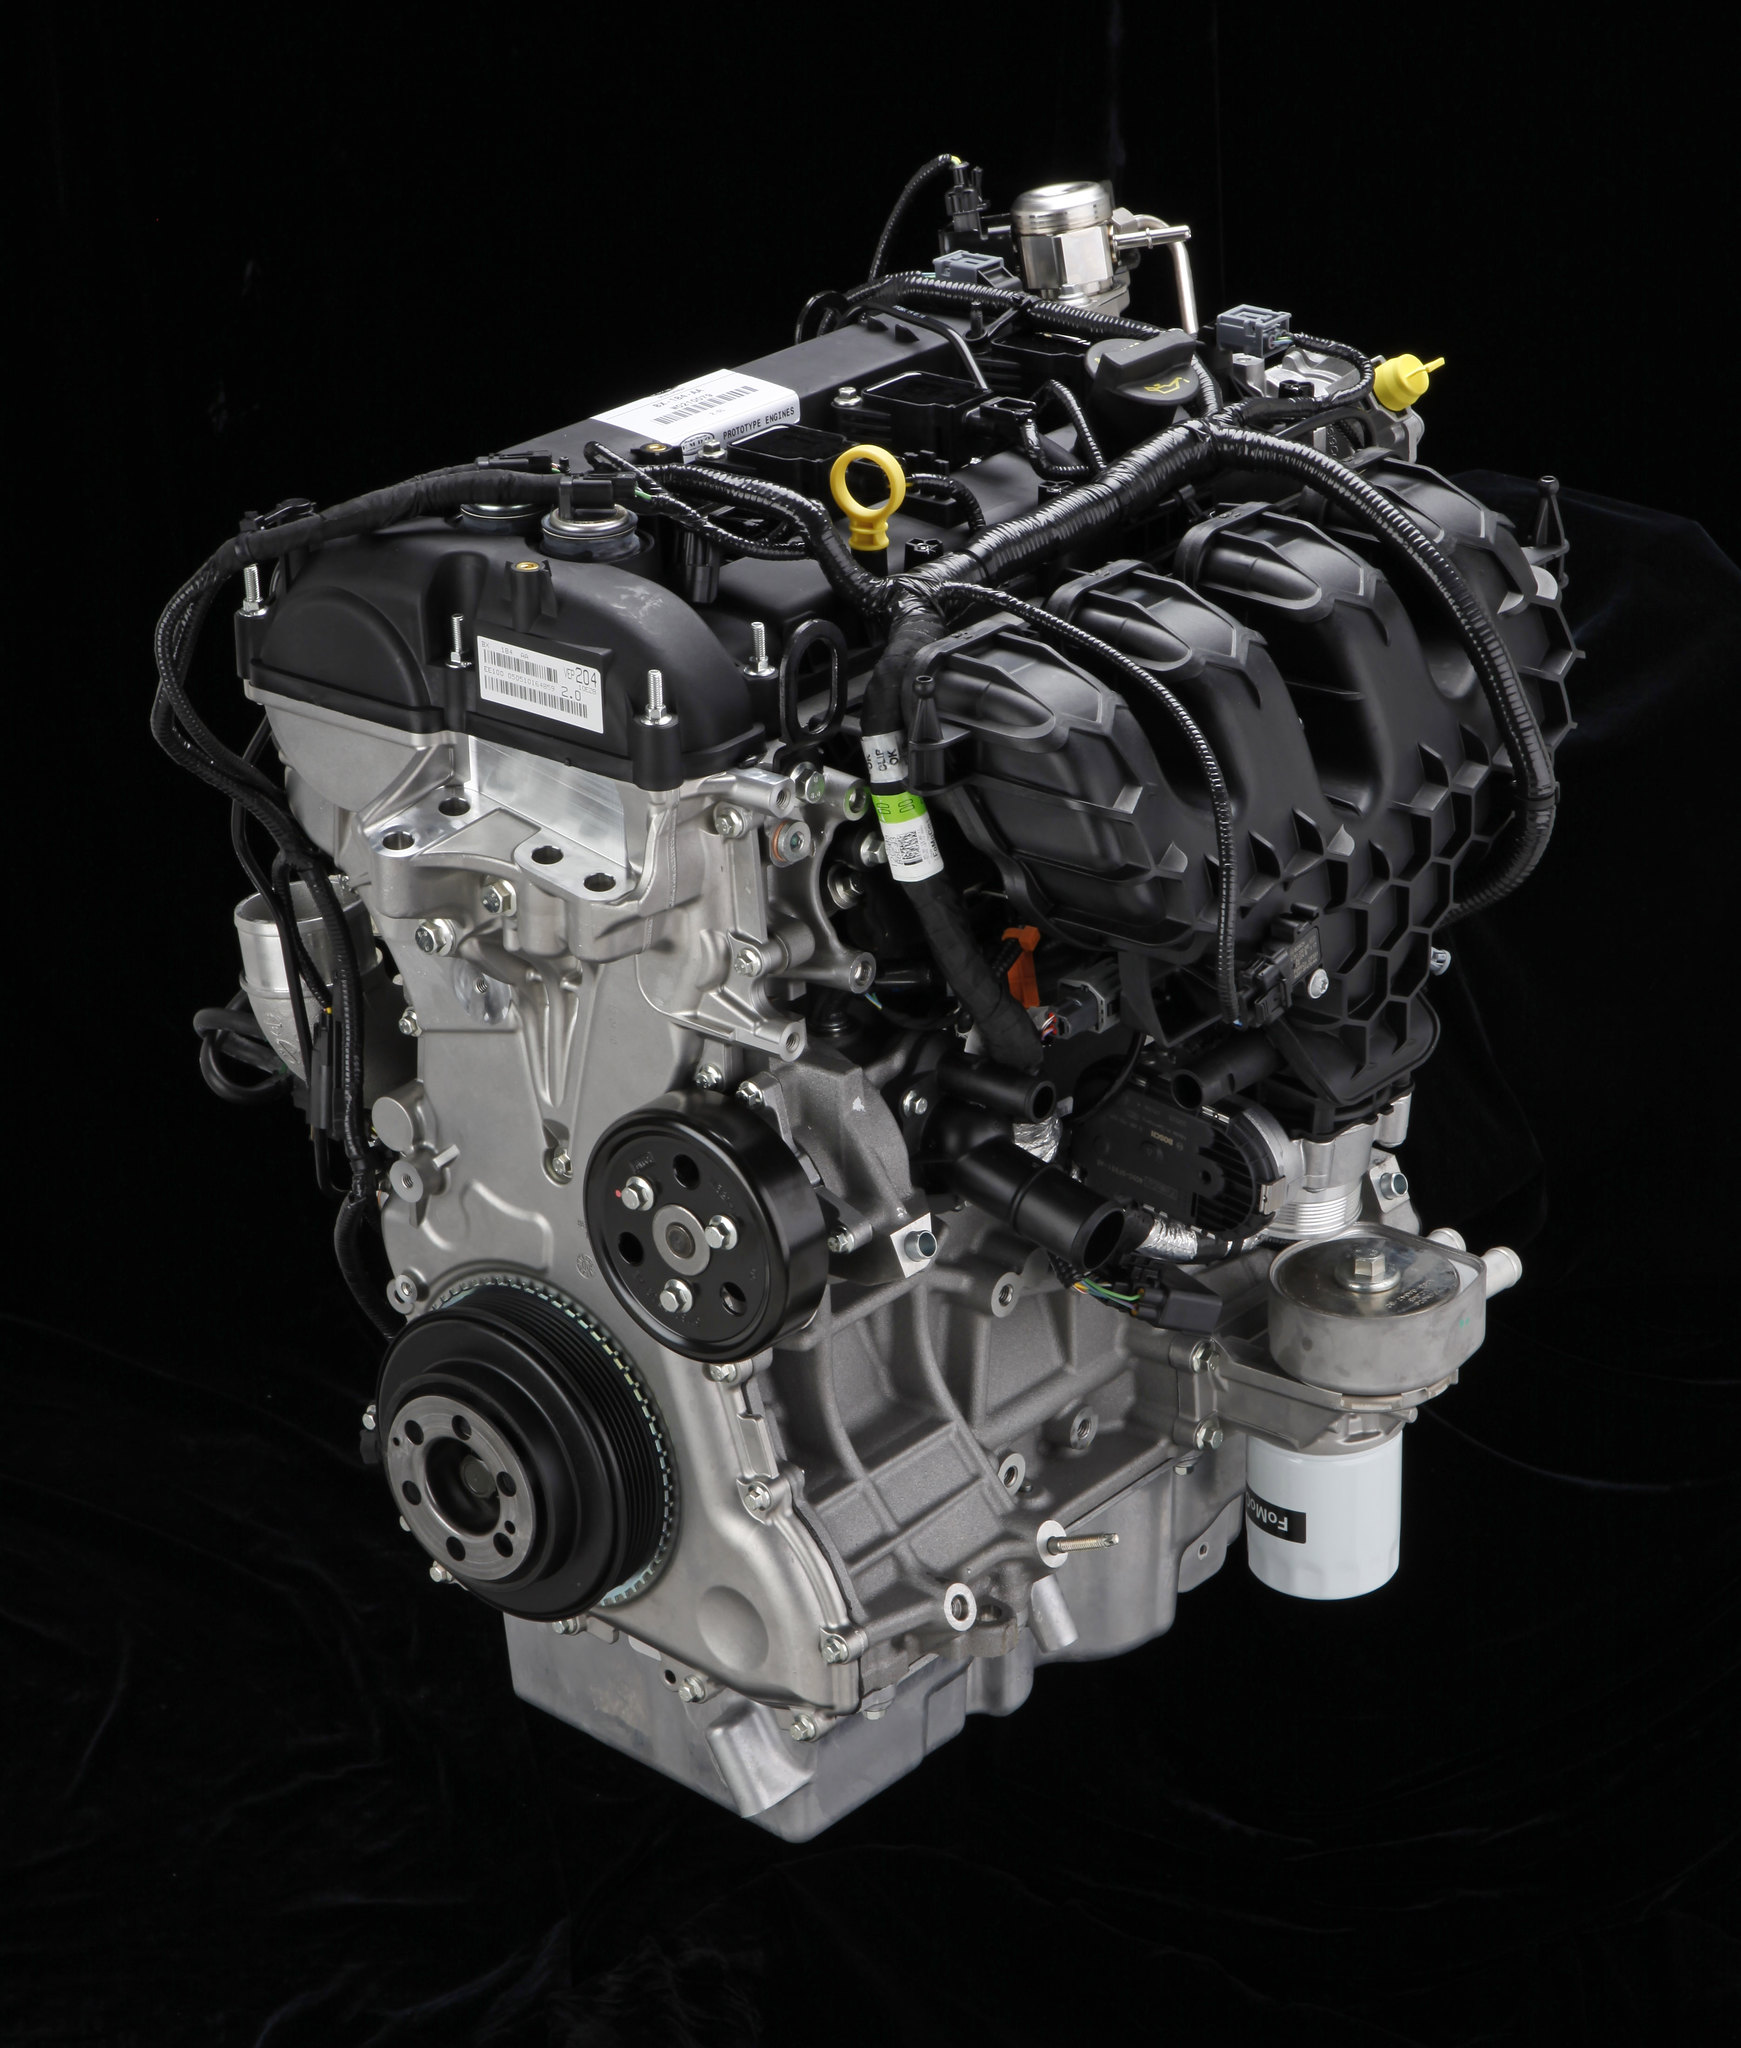
MHI Honda 2.0L Stage 2 Turbo Upgrade Install Instructions
Congratulations on joining the Full-Race family. Your new MHI turbo upgrade for the Honda 2.0L engine is your ticket to the fast lane. The installation and removal process is 100% identical to OEM Honda turbochargers. Please take the time to read these instructions carefully. Contact us if you have any difficulties during the process.
Applications:
- 2017+ HONDA CIVIC TYPE R (FK8)
- 2018+ HONDA ACCORD 2.0T (CV2)
- 2019+ ACURA RDX 2.0T (TC1/TC2)
- 2019+ ACURA TLX 2.0T (UB5/UB6)
Important Notes:
Turbocharger replacement requires a high level of automotive mechanical skill, experience, and tools. There is a risk of damage to both the turbocharger being removed, as well as the new turbocharger if adequate care is not taken—I.e., Do NOT lift the turbo by the wastegate actuator arm.
Installation of the Full-Race turbocharger upgrade from MHI assumes the user has a sufficient level of skill, experience, and tools, to complete this task successfully. We highly recommend installation using a vehicle lift. Also, professional installation is recommended. Some procedures will not be described in full detail. If you run into any installation issues or have trouble comprehending any of the procedures, please contact us or a qualified auto shop or auto technician to help you through the process.
Always make sure the car is safe to work on. Do not work on a hot motor. DO NOT WORK ON VEHICLES SUPPORTED BY A JACK ONLY. USE SECURE JACK STANDS!
There are two types of turbochargers fitted to the 2.0L Honda vehicles: the larger Civic type R turbo and the smaller Accord/RDX/TLX turbo. The vehicle used in this guide is a 2017 Honda Civic Type R. Other cars will follow the same steps but with 2 minor changes. See step 14B and consider doing it before installation.
Tools Required:
- Lift or jack and jack stands
- Drain pan for oil and coolant
- 10mm socket (6 point)
- 12mm socket (6 point)
- 14mm socket (6 point)
- 3/8" ratchet
- 1/2 “ ratchet
- O2 sensor removal tool (slotted ⅞” or 21-22mm socket)
- Wobble and straight 3/8" Extensions
- Phillips and flathead screwdrivers
- Magnet (if you drop anything)
- Channellock pliers
Parts Required:
- MHI 2.0L Honda Turbo Upgrade
- Honda gasket kit and 2 replacement studs
- ACCORD / RDX / TLX ONLY: coolant hardline (19522-6B2-A00 Pipe A, Turbocharger Water)
- ACCORD / RDX / TLX ONLY: downpipe (18180-5BF-A00 Type R, Catalytic Converter)
- Penetrating Lubricant (Liquid Wrench, PB Blaster, or Seafoam)
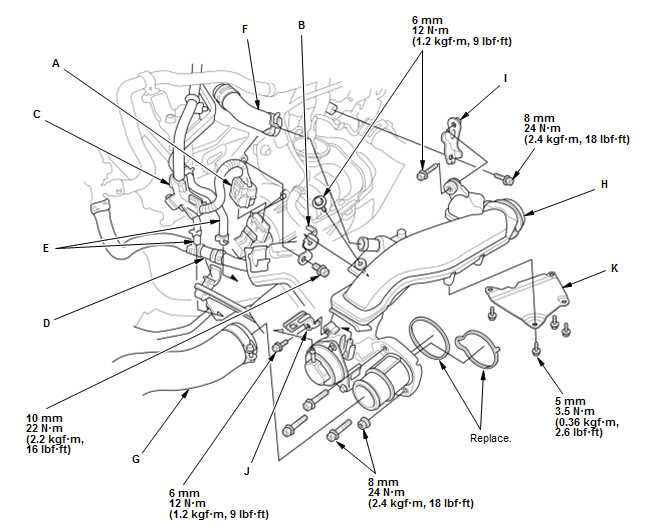
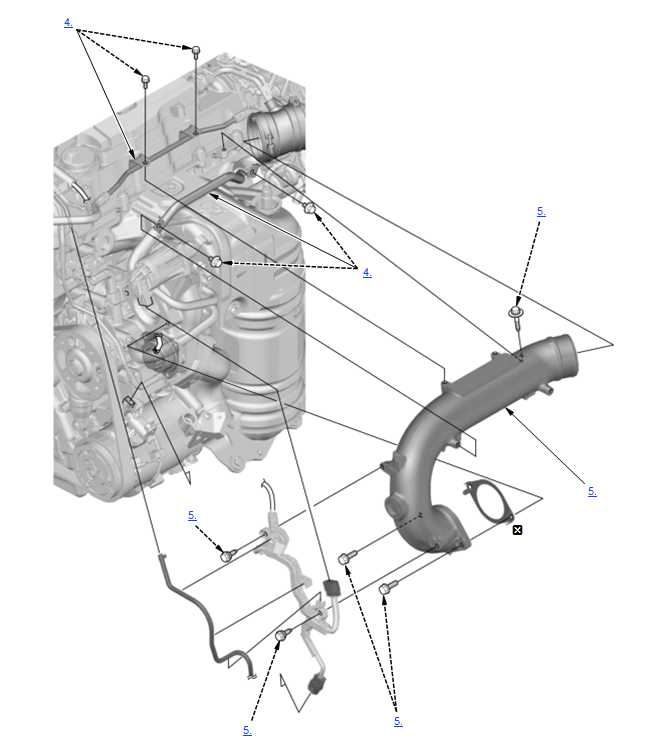
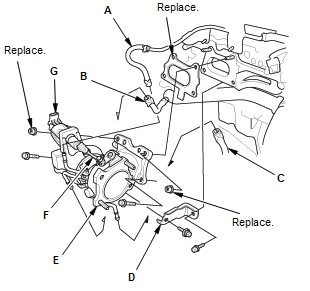
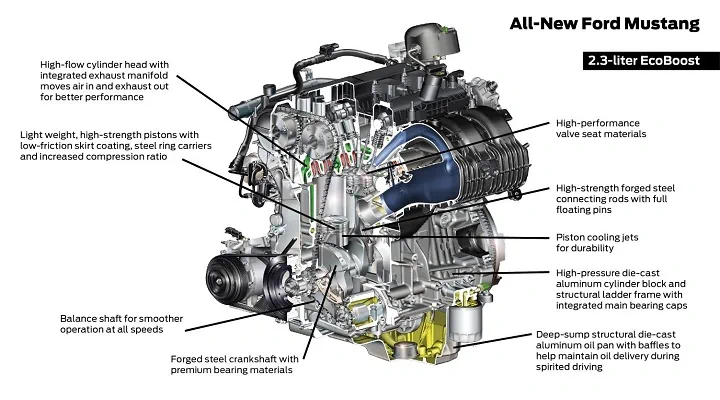
Component Diagram:

Installation:
Disconnect the battery and raise the car safely. **Support with jack stands if using a jack**
Step 1
From underneath the vehicle, disconnect intercooler pipe from the turbo, aka charge air cooler hose.
Step 2
From above the engine bay, begin removing the intake components.
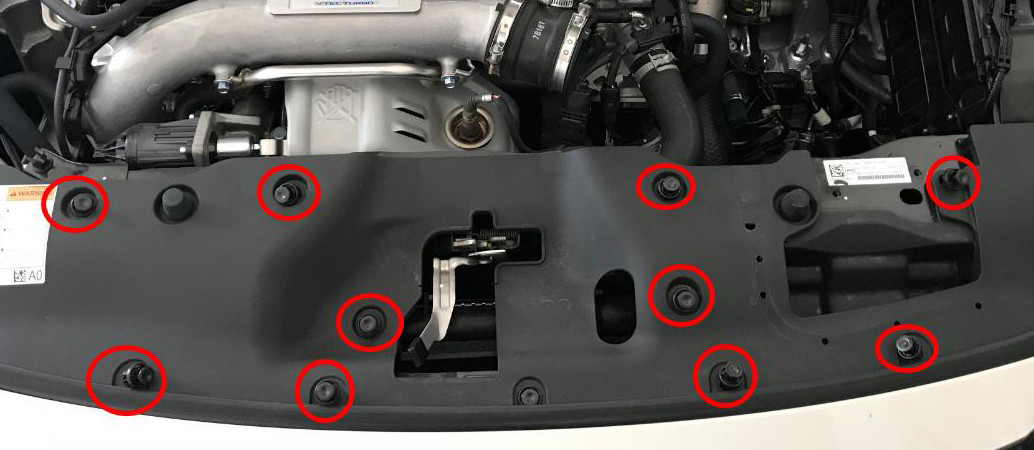
- Remove engine cover
- Use a flathead screwdriver and unclip 10 plastic push fasteners on the radiator cover
- Remove EVAP Purge Nozzle
- Unplug Wiring Connector (A)
- Remove Harness Holder (C)
- Remove Hose Joint (D)
- Disconnect the hoses (E), the valve cover PCV breather hose (F), and Intake Air Duct (G)
- Unplug and Remove MAF Sensor
- Remove the intake tube aka “Turbocharger Joint” (H)
Step 3
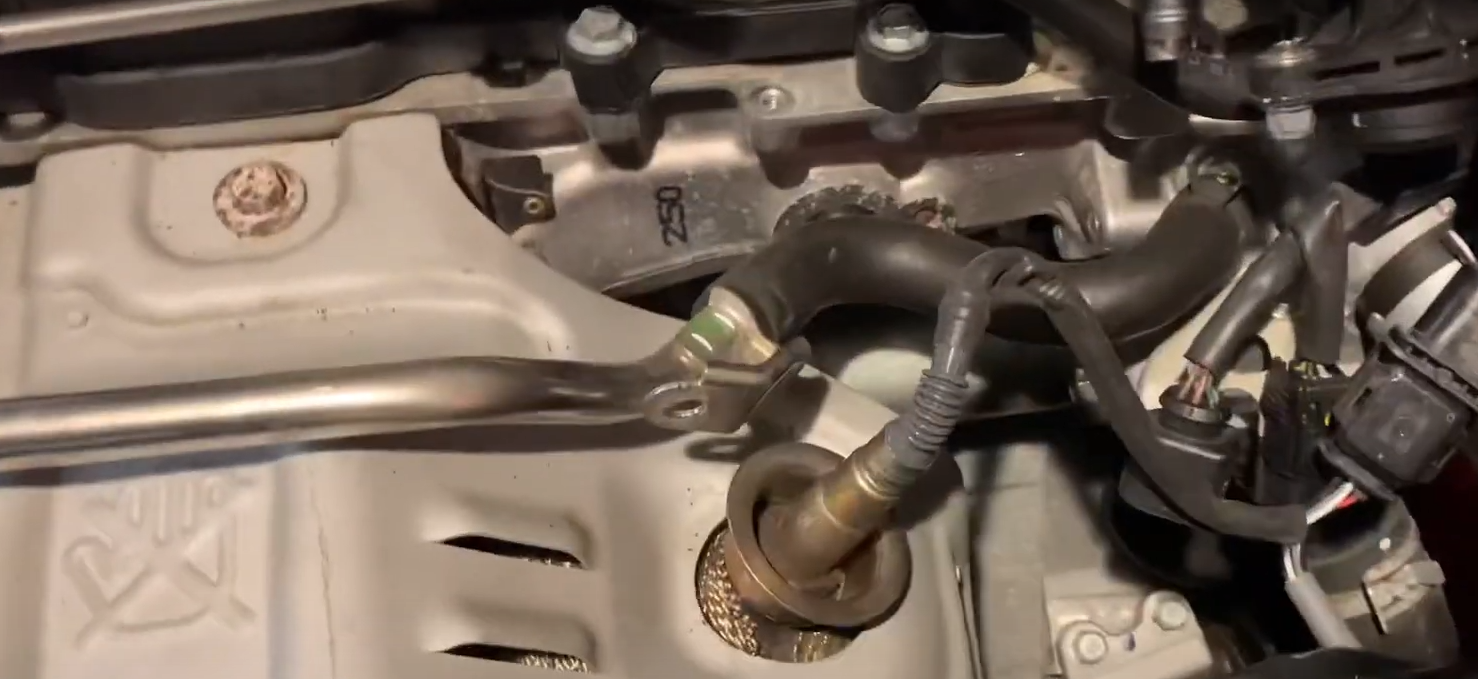
Using a 10mm socket remove the hardline and wire harness from the intake pipe.

Step 4
Use a 12mm socket to remove the turbocharger inlet and gasket.
Step 4a
Unplug 02 Sensor. Using the O2 sensor tool, remove the O2 Sensor.
Step 4b
Remove the turbocharger heat shield using a ratcheting 12mm wrench. The front one by the radiator is a tight squeeze.
Step 5
Next, we begin to unbolt the downpipe. These nuts and bolts get hot and therefore tend to stick in place.
We recommend using penetrating lubricant (Liquid Wrench, PB Blaster, Seafoam, etc.) and letting it soak in for hours. Repeat the application several times. You may also want to use a small torch to heat the fasteners and make them easier to remove. Take your time and be smooth. Don’t use an impact gun or jerky movements on a breaker bar—that will strip your hardware. Use anti-seize now and you'll never have a problem in the future. Do steps 6-8 while you wait.
Step 6
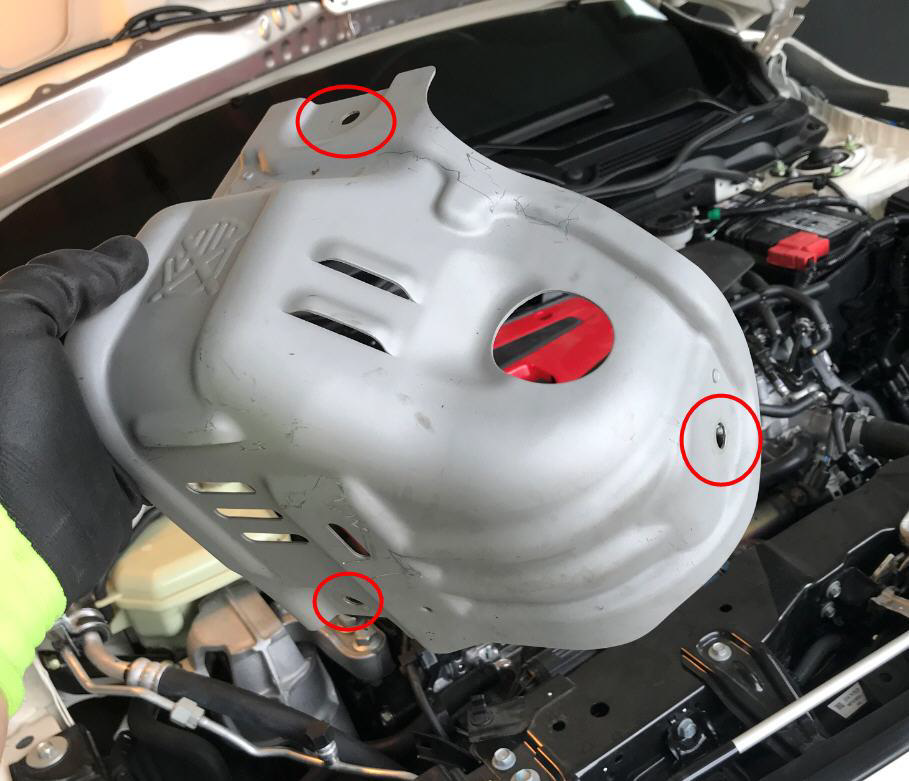
Remove the quarter-turn fasteners and the undertray.
Step 7
Using a 14mm socket, unbolt all 5 downpipe fasteners shown below. Once all hardware is removed and the downpipe is free, extract it out of the engine bay. This can be lifted up with some wiggling or dropped down if you remove the plastic undertray.
Step 8
Remove the oil feed hardline and be careful and do not bend or kink it! Do not get any contaminants inside of it. Usually, it's a good idea to put a rubber glove or something similar around the end of it.
Step 9
You can either drain some coolant now OR you can clamp the turbo’s coolant hoses to save time.
Step 10
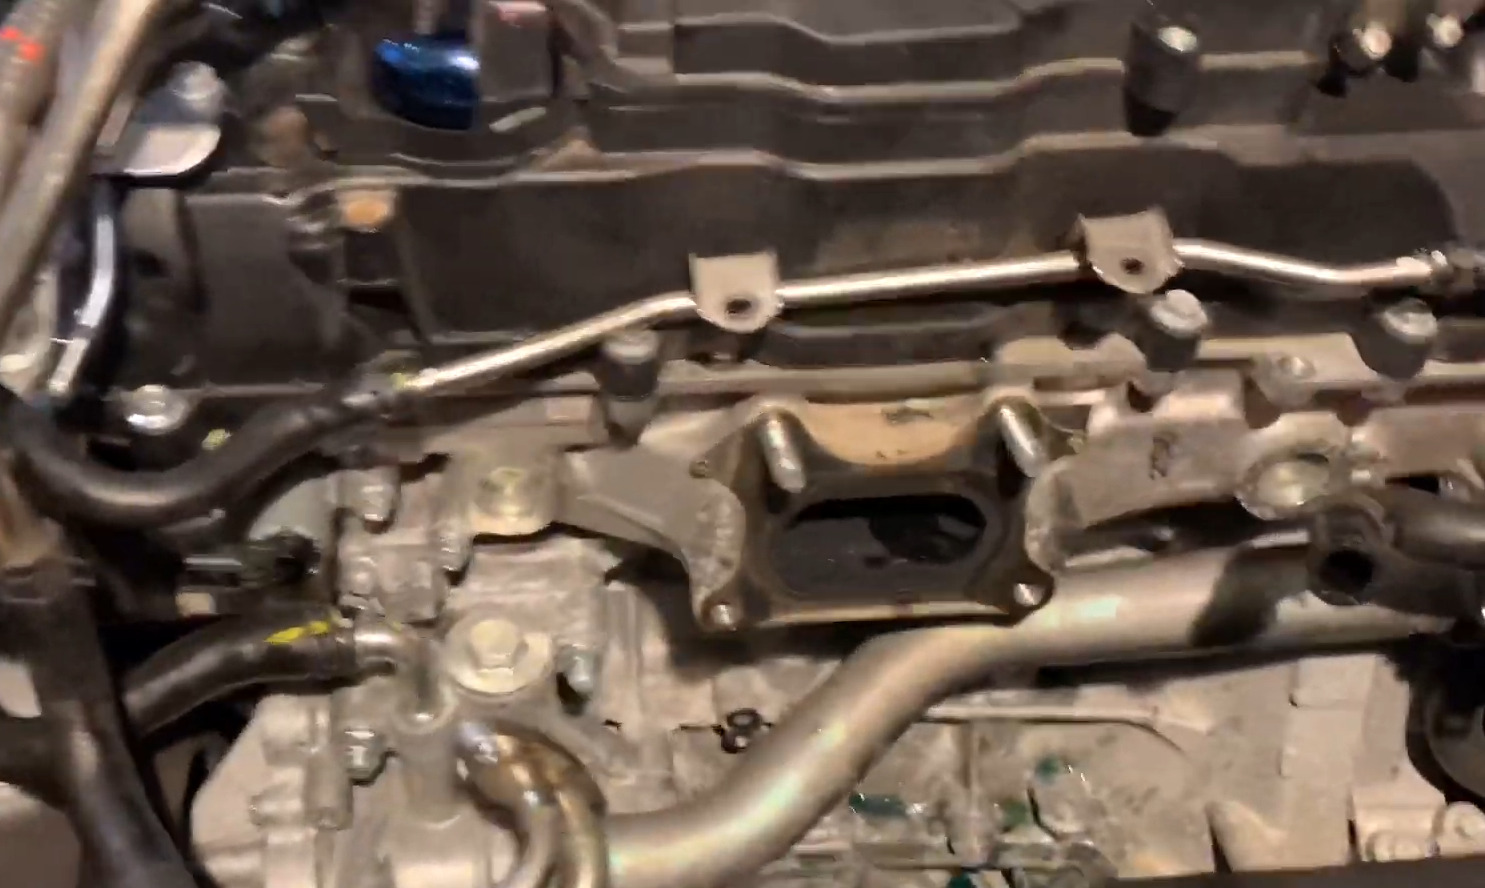
Now we can begin to physically remove the turbocharger itself.
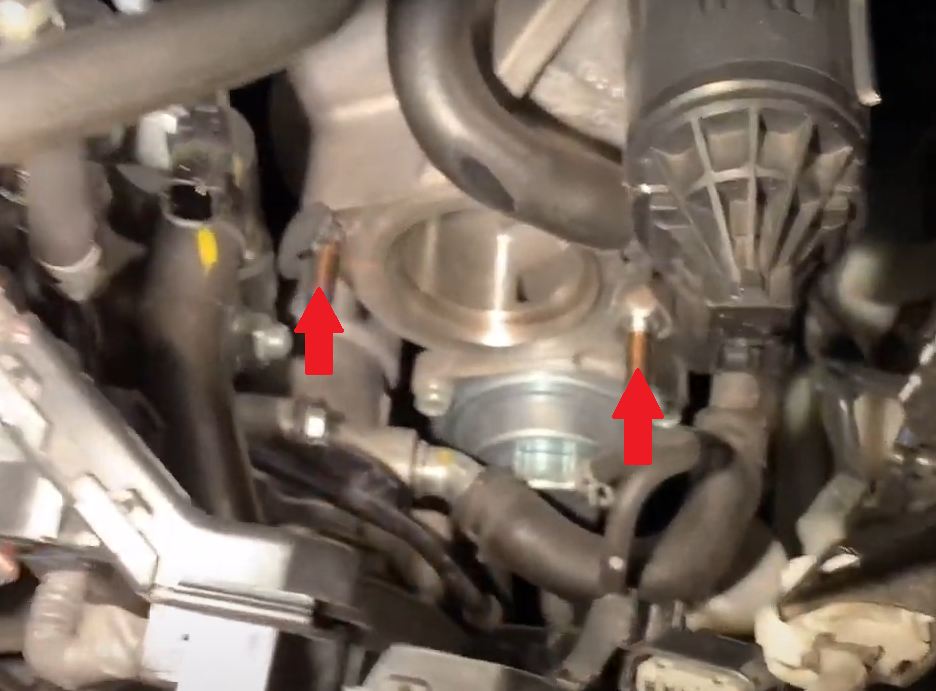
This step is to remove coolant lines, but all components that will be removed are shown below.
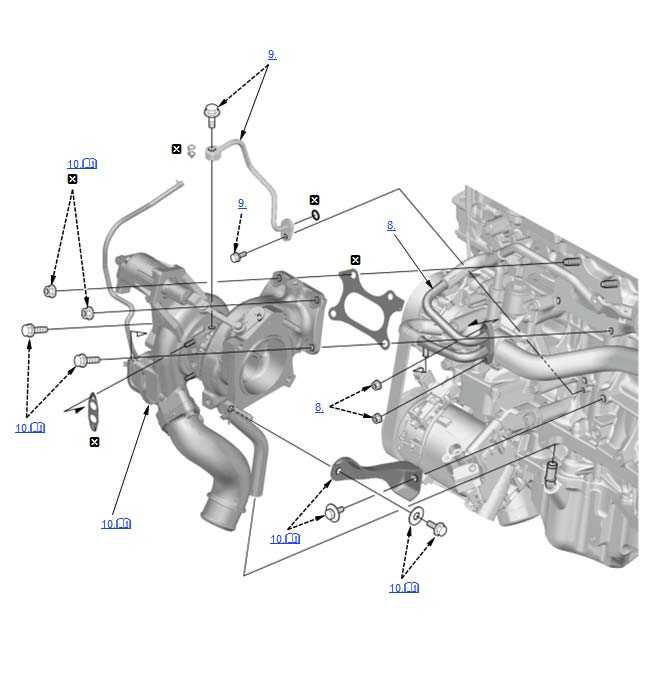
Use a 10mm socket to unbolt the water cooling adapter. Be careful not to bend or damage it.

Step 11
Disconnect the oil return hose from the turbocharger’s hardline.
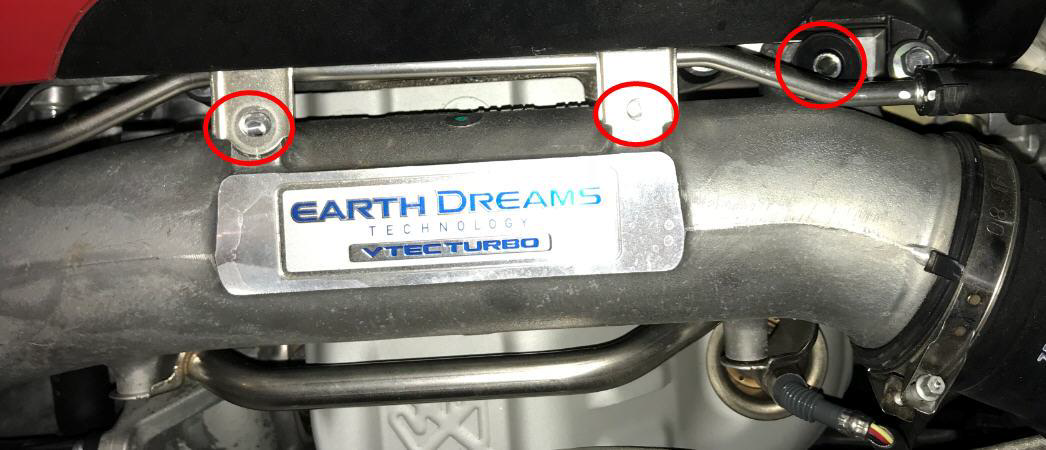
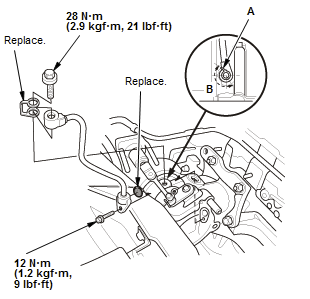
Step 12
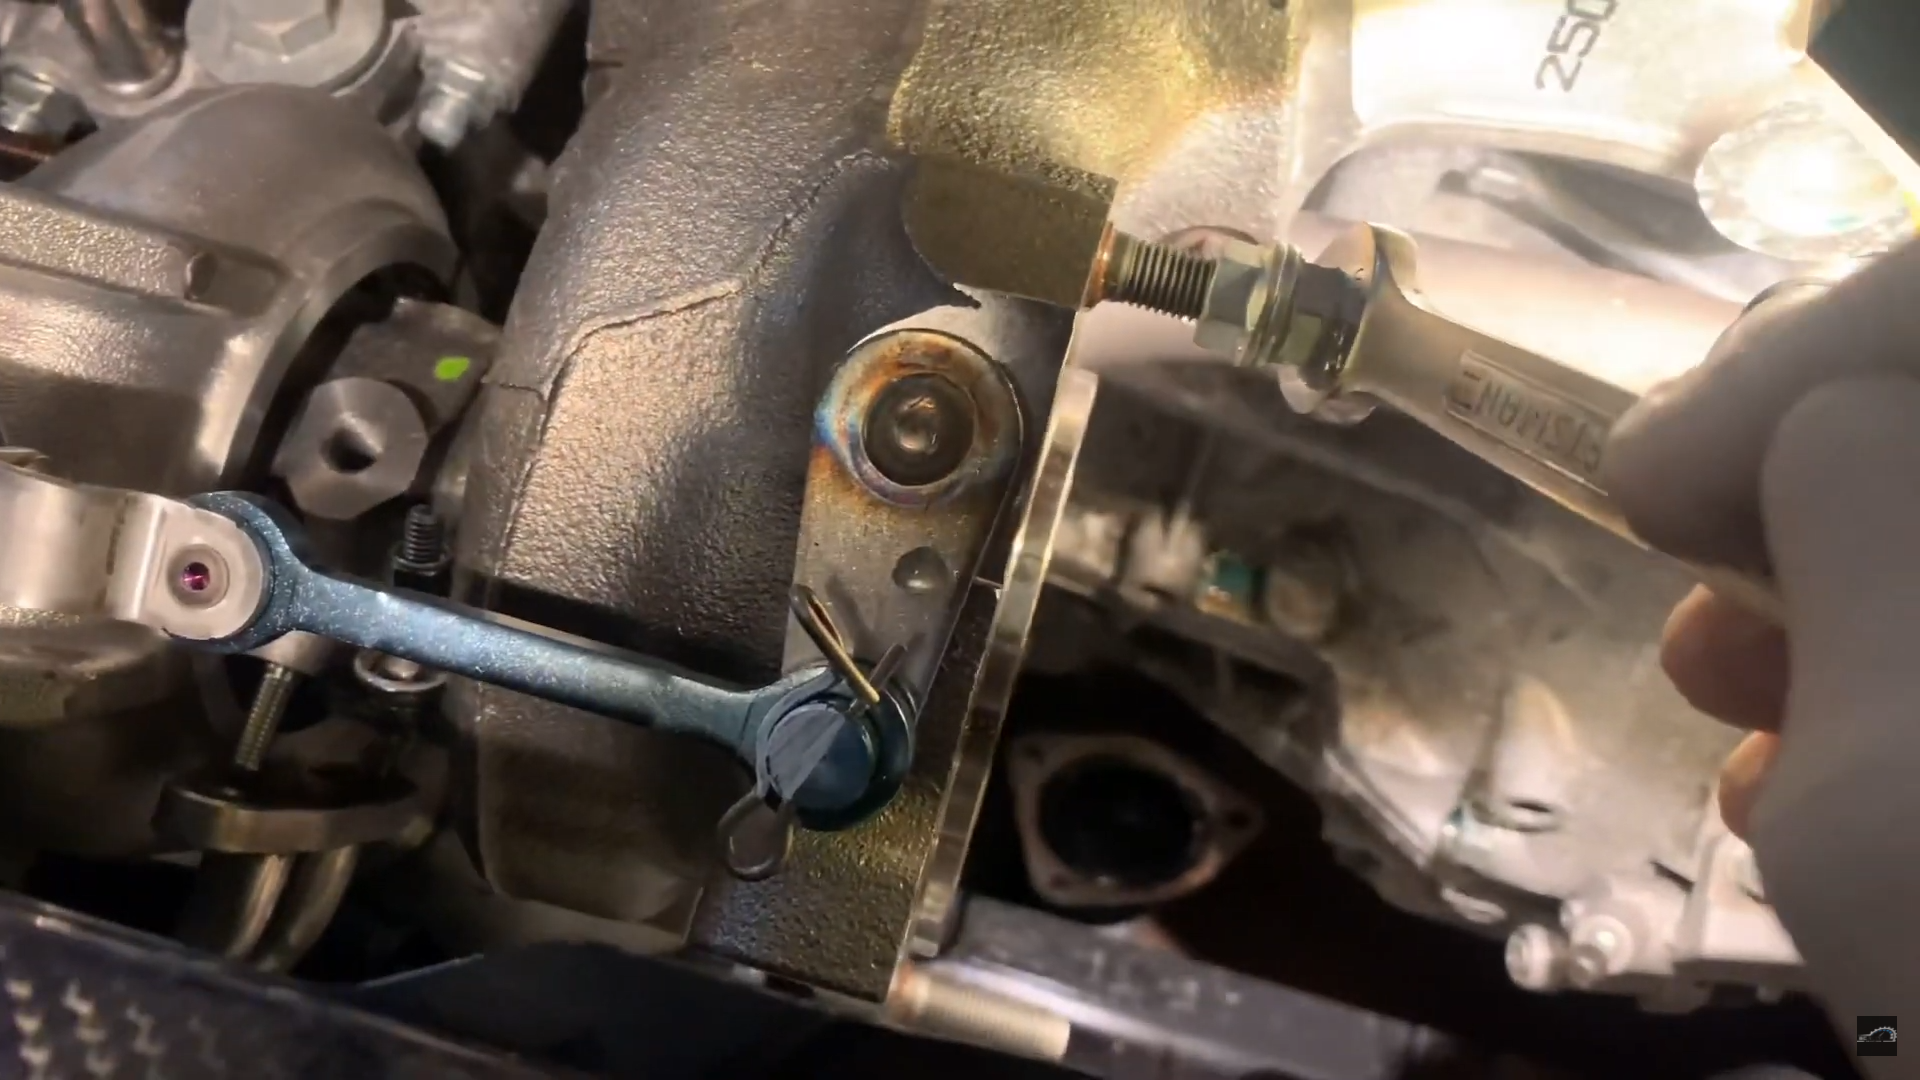
Remove Turbocharger Support Bracket (D) using a 14mm socket and a wobble adapter.
Step 13
Using a 14mm socket, unbolt the cylinder head turbocharger hardware, then carefully remove turbo from the engine bay. DO NOT LIFT TURBO AT THE WASTEGATE ARM.
Congratulations! You're halfway done!
Take a deep breath, and put both turbos on a workbench. Now breathe in and out 10 times slowly.
It's time to begin swapping hardware and new gaskets onto your new turbocharger and you don’t want to rush. NOTE: DO NOT USE RTV ON THE OIL DRAIN OR COOLANT GASKETS.
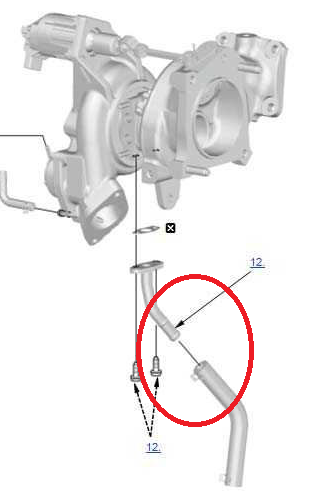
Step 14
Install the water cooling adapter. Use a new gasket (19524-RPY-G01 Gasket, Turbocharger Pipe) and install the water cooling adapter on the new turbo.
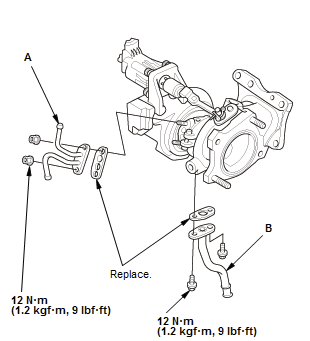
Step 14a
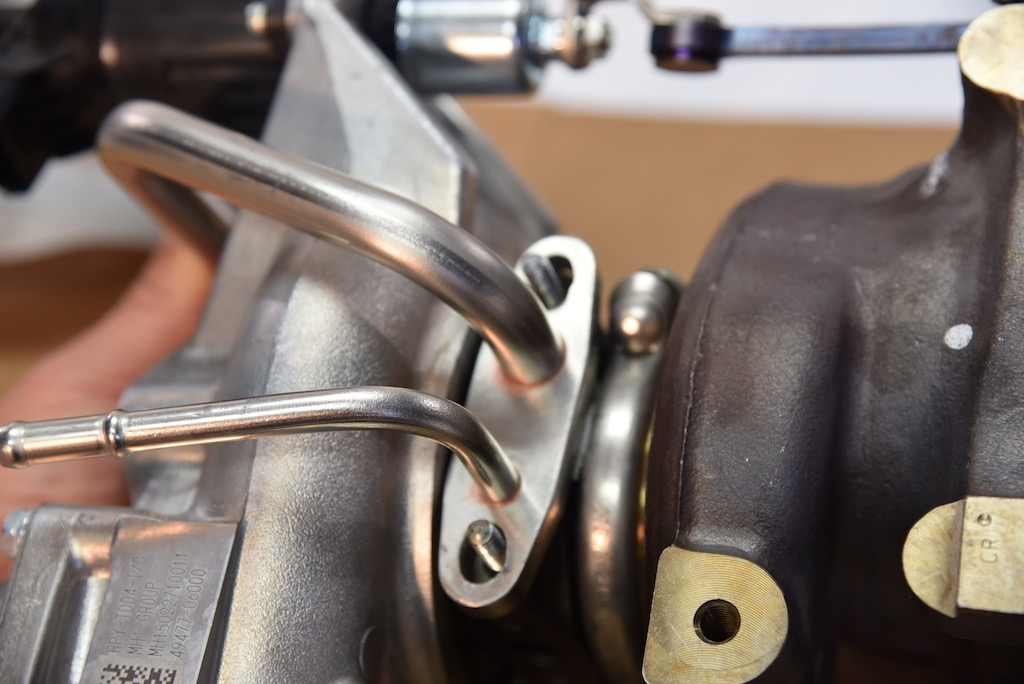
STEP FOR ACCORD, RDX, OR TLX ONLY (NOT FOR FK8 CIVIC TYPE R). The Accord turbo water cooling adapter needs modification to fit the Civic Type R turbo. The locating holes need machining (or die grinding) to line up with the mounting studs on the center section. Our suggestion is that you purchase a new unit to modify (19522-6B2-A00 Pipe A, Turbocharger Water) They are inexpensive and easy to address off the engine. Make sure the water cooling passages are centered.
Step 14b
Swap the oil return hardline and gasket.

Step 15
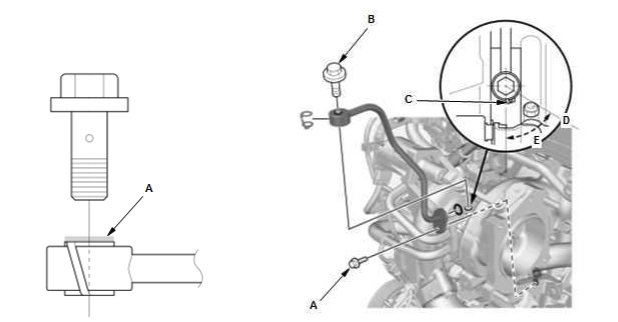
Install M10 turbo-to-downpipe studs using the double-nut procedure. USE ANTI SEIZE when installing these.
Full-Race recommends using 2x new studs part number (90010-59B-000 stud, turbocharger) but if you’re in a rush you can remove them from the old turbo using double nuts and a torch for heat. If removing the old studs, don’t go crazy and strip them. And don’t use an impact gun. Using penetrating lubricant multiple times with a torch is the only way to safely remove studs.
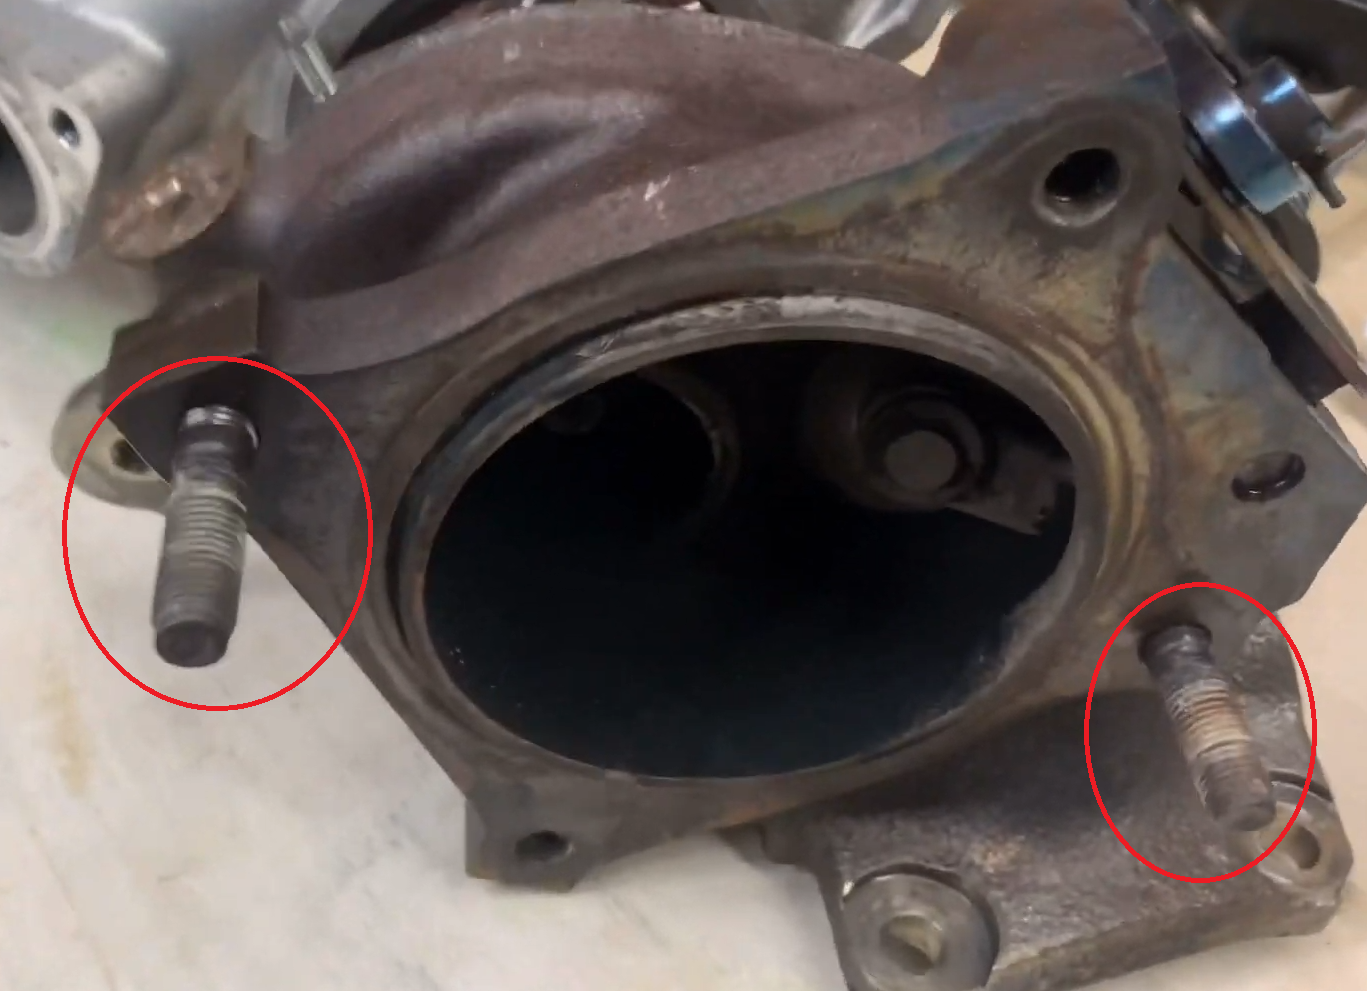
Use the double-nut technique to lock 2 nuts together when installing the studs. Always use anti-seize on hot-side turbo hardware! Why Honda and Toyota don't use anti-seize is beyond us.
Step 16
Swap over turbocharger support brace (D) in the diagram below. Apply anti-seize to cylinder head hardware and the support brace hardware, and then place turbocharger on the studs. Tighten 4x 14mm nuts for turbo and 2x 14mm bolts for a brace. Smile at your new turbo in its glorious home. Honda says to replace the hardware and gasket, but they can be reused if undamaged and in good condition.
Step 17
Make certain the oil feed line did not get any debris or dirt in it. Reconnect the oil feed line with new crush washers. Apply a drop of new engine oil to the top surface of the washer.
Step 18
Reconnect the oil drain hose and water cooling hoses. Hoses should be fully inserted over tubes. Clamps must be moved in place with pliers or Channellock pliers.
Step 19
Reinstall all removed parts described in steps 1-7. Use anti-seize before tightening downpipe hardware and O2 sensor. Reinstall the intercooler pipe, intake tube, PCV breather, EVAP purge, wiring harness, and MAF sensor.
Triple check all connections, especially the intercooler pipe. You don't want any leaks on a turbocharged MAF vehicle!
Step 20
Reinstall the heatshield.
STEP FOR ACCORD, RDX, or TLX ONLY (NOT FOR FK8 CIVIC TYPE R): modify the Accord heat shield by drilling a hole to line up with the bolt hole on the CTR turbo. You need the heat shield, do not skip this step. The turbo can glow red-hot and will cook objects close by.
Step 21
Change engine oil and top off any coolant lost during the installation process.
Step 22
Unplug the coil packs. WHILE THE COIL PACKS ARE UNPLUGGED, push the throttle pedal wide open and hold it there (this disables the fuel injectors while cranking). Crank the motor for 10 to 15 seconds 2 times to allow oil pressure to build within the turbocharger.
Step 23
Reconnect the coil packs and fire the motor with your foot off the gas pedal and the splash pan removed. Allow the engine to idle for a few minutes and inspect all connections and lines for any fluid leaks or interference problems.
NOTE: some smoke is normal at this point while any fluids burn off the turbocharger.
Step 24
Reinstall the splash pan. Take a short test drive to ensure that all boost hoses are secure and everything is performing normally.
You are done! Happy motoring!
Resources
All Articles
For SHOP OWNERs
& KIT BUILDERs
Full-Race Motorsports is the most
trusted name in turbocharging.